In this quick pixel tutorial you will learn how to draw a pixel art sword! We will cover the simple steps it takes to create your very own sword made out of pixels!
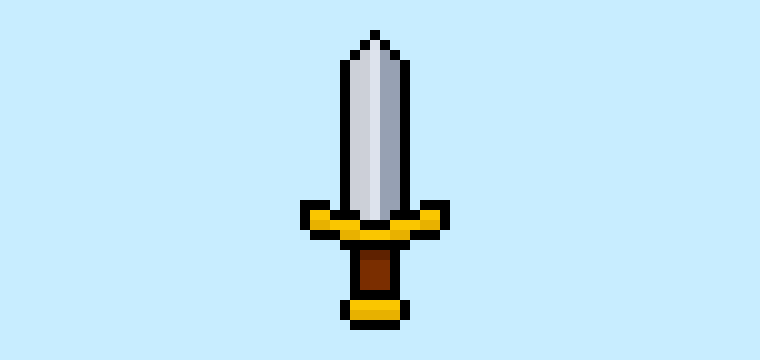

Are you ready to create your own pixel art sword? Learning how to design a cute pixel art sword is more popular than ever! Whether you’re looking to create a pixel art sword sprite for your knight character in a mobile game or maybe you just want to share some new pixel art as part of your medieval collection to your social media account this pixel art tutorial will help you make a pixel sword quick and easy.
How to Make a Pixel Art Sword
These are the basic steps for how to make a pixel art sword:
- Select a Pixel Art Software such as Adobe Photoshop, Mega Voxels or Aseprite
- Create a 32×32 pixel grid for your sword
- Sketch out an Outline for the shape of the sword
- Fill in the color of the pixel art sword
- Draw a Shade on the sword to create depth
- Fill in the Background with Color
Now that you are aware of the basic steps on how to create a pixel art sword, we will cover each step visually so that you can follow along on how to create it.
If you are completely new to pixel art we recommend reading our post How to Create Pixel Art: Beginner’s Tutorial
Select a Pixel Art Software
In this beginner tutorial we will be showing you the steps to design your own pixel art sword using a pixel editor software. Before we begin you will need to know how to create a grid and use the pencil tool in Mega Voxels. Once you create your pixel art sword, you can use the pixel art in other games such as Minecraft or software such as the Unity Game Engine. In this tutorial we will be using the Mega Voxels Pixel Editor. We offer tutorials on how to use the Mega Voxels Pixel Art editor below:
Want to see what pixel art software is best for you? Read our post Top Free Pixel Art Software
Create a Grid
To begin we will be using a simple 32×32 pixel grid to draw a small pixel art sword. This size is common when making pixel art, especially for projects like video games. Be sure that your canvas is set to the color White (#FFFFFF). This will be our canvas that we use to draw our pixel art sword on. You should have a canvas, also known as a spreadsheet, that looks something similar to this:

Sketch an Outline for the Sword
Next we will start by creating the outline for the sword so we can get the overall shape for our pixel sword. To do this choose the color Black (#000000) and activate the pencil tool in your editor. Since this determines the overall shape, feel free to adjust the outline to what match your game or art project. As a guide, you can use the outline we made below for your sword or like we mentioned before feel free to design your own.

Fill in the Color
Now that you made an outline for your pixel art sword, we will add some color to make it stand out. Fill in the top of the helmet, the main section of the body and half of the sword a traditional gray color (#A3A3A3). Next lets color in the face mask, the belt and the inside of the shield a dark gray (#686868). Now lets color the outer rim of the shield, the center of the armor and the belt buck a light gray (#CCCCCC). And last but not least lets color the feather on the helmet, neck piece and the design on the shield a nice dark red color (#770601). Try matching the picture of our 8 bit pixel art sword below.

Draw the Shading
So whenever you make pixel art there are essentially two parts to shading: the highlights and the shadows. We will start with the shadows. We will be applying shadows to our 32×32 pixel art sword in two places. First will be the bottom of the face mask and belt. To create a shadow color for the sword face mask and belt we will use a darker gray based on the dark gray we used before (#545454). The second shadow will be for the bottom of the feet which will be the same color we colored it before but again it will be a darker gray (#949494). Try to match where we put the shadows in the image below.

So now that you got the basic idea we will continue adding some depth to our sword to give it a 3D feel. Let’s create a highlight using the same gray from the sword helmet and body armor, but instead of going darker this time we will go lighter (#BEBEBE). Remember, this doesn’t have to be the exact color in fact this is an opportunity to make the sword look like your own. In our version we highlighted the top section of the helmet, body armor and arms. We will also give our face mask a highlight by using a lighter gray (#A8A8A8). Use our image as a guide for your sword.

Great! When you are happy with your shadows and highlights on your sword, be sure to view your final image. To see your pixel art sword go ahead and turn off the grid lines to make sure you like the way the sword came out.

Fill the Background Color
Finally, let’s change the background color of our sword sprite to really make our sword stand out nicely. Select the Bucket fill tool in your editor. For the color enter a very Light Blue (#BCEAFE). Then simply click on the white area outside of the pixel sword.

Where to Go From Here
Congratulations! You now know how to create your very own pixel art sword. Try making different types of sword pixel art by changing the size and colors.
Bonus: Make a 3D Pixel Art Sword

Now that you have drawn your own pixel art sword, you can turn it 3D with Mega Voxels. Mega Voxels contains a 3D Pixel Art Maker that allows you to convert traditional 2D pixels into 3D pixels. Simply download the free Mega Voxels app for iOS or Android.


Then import the pixel art you just made using the Add File button inside of the My Gallery page. And that’s it! Mega Voxels automatically transforms you pixel art sword into a 3D pixel art sword. You can now create 3D turntable videos of your 3D pixel art sword and even view your sword in Augmented Reality!