In this beginner voxel art tutorial you will learn how to create voxel art to use in your projects and games using the Mega Voxels app! We will cover everything from creating a voxel model to sharing it on social media!

Do you want to create your own voxel art? Whether you are aiming to make something fun to share on your Instagram account or maybe you need a character for your next video game, this Mega Voxels tutorial will help you build voxel art fast with Mega Voxels.
Getting Started
Voxel art is a quick and simple way to create 3D models for your games or art projects like the amazing photos you see on Mega Voxels! This is one of the many reasons why artists and creators love using voxels. As of this writing there are several tools available for creating voxel art, but in this tutorial we will be using the latest voxel editor available on the App Store and Google Play. Mega Voxels is a fun and easy way to start building voxel art because of its many features! Best of all, its Free!
If you need to download the Mega Voxels app, you can download it free from the Apple App Store or Google Play Store. Visit our website to get Mega Voxels.
Once you have Mega Voxels installed, go ahead and open up the app on your device.
How to Create a Voxel Model
Now that you have the Mega Voxels app, we will show you how to create your first voxel model! In this tutorial we will create a voxel dog that you can use in your projects.
Creating a New Voxel Scene
Let’s start by creating a new file so that you have a blank canvas. When you first open the app you will see a blank screen with two buttons toward the bottom. To create a new file select the “Create New” button. This will open the Create New Scene menu.

Once open you can give your new scene a name. You can also specify the size and whether your starting grid should be full of voxels or empty. First enter the name “VoxelDog”. Then for this tutorial, select the preset size of 16x16x16 for the grid. Lastly make sure that Fill Grid is not selected because we want our grid to be empty. When you’re done click Create.

Basically this creates an empty grid in your scene. If not selected go ahead and tap on it. Once it is selected you should see a context menu appear right above your grid. Go ahead and click the Edit icon to begin editing your model.

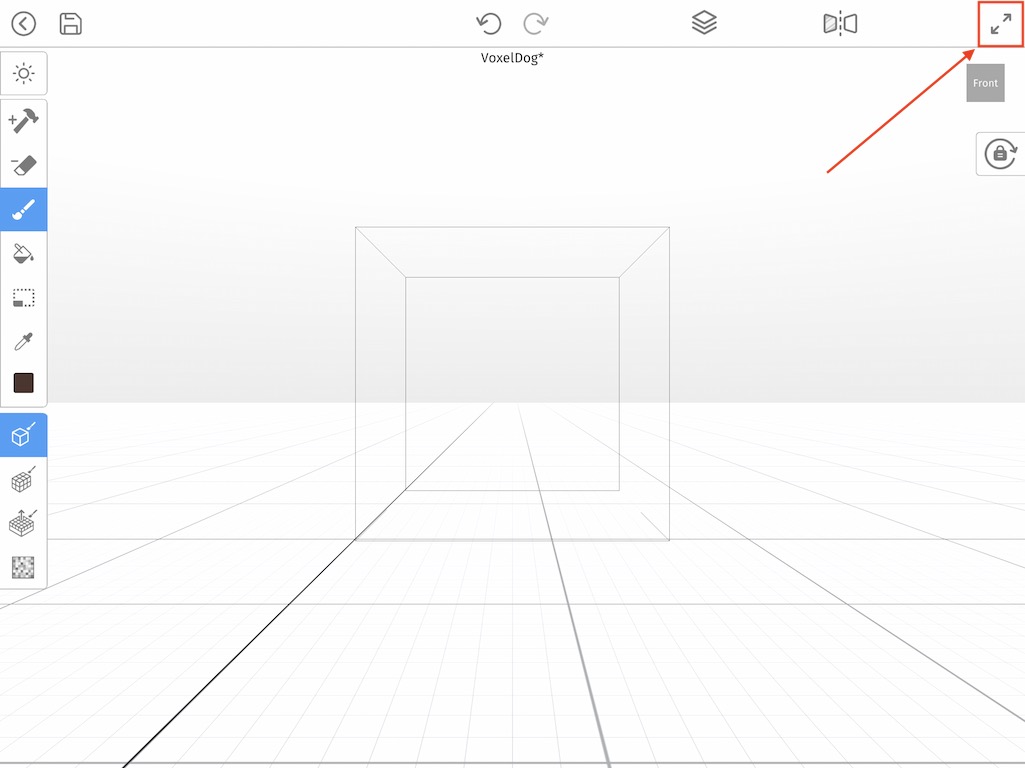
You are now in Editor mode. This mode allows you to add, delete, and color voxels on your model. In addition you can resize your grid here as well. We will do just that. To do this click the two arrow icon on the top right of the editor. This will open a menu that has width, height and depth of your grid.
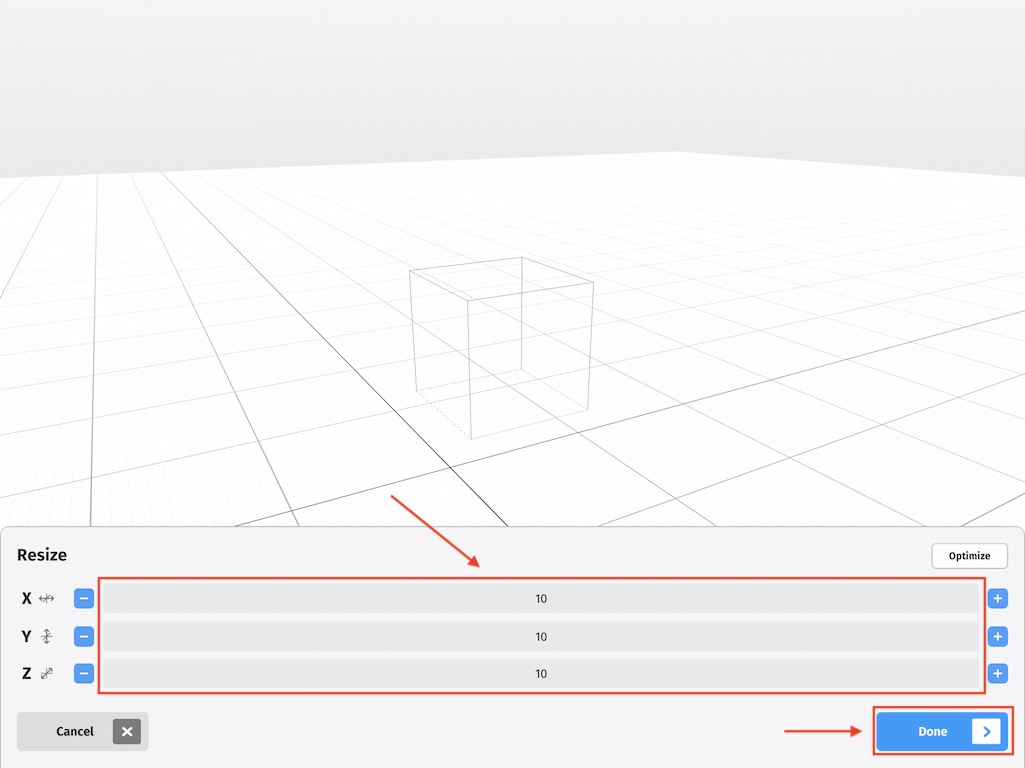
We will enter 10 for each axis. When you’re finished press Done.
Awesome we now have a grid to create our model where we can begin constructing our voxel dog.
Creating the Base
Now that we have our grid set up and our file saved, we will begin by creating the base of the VoxelDog’s body.
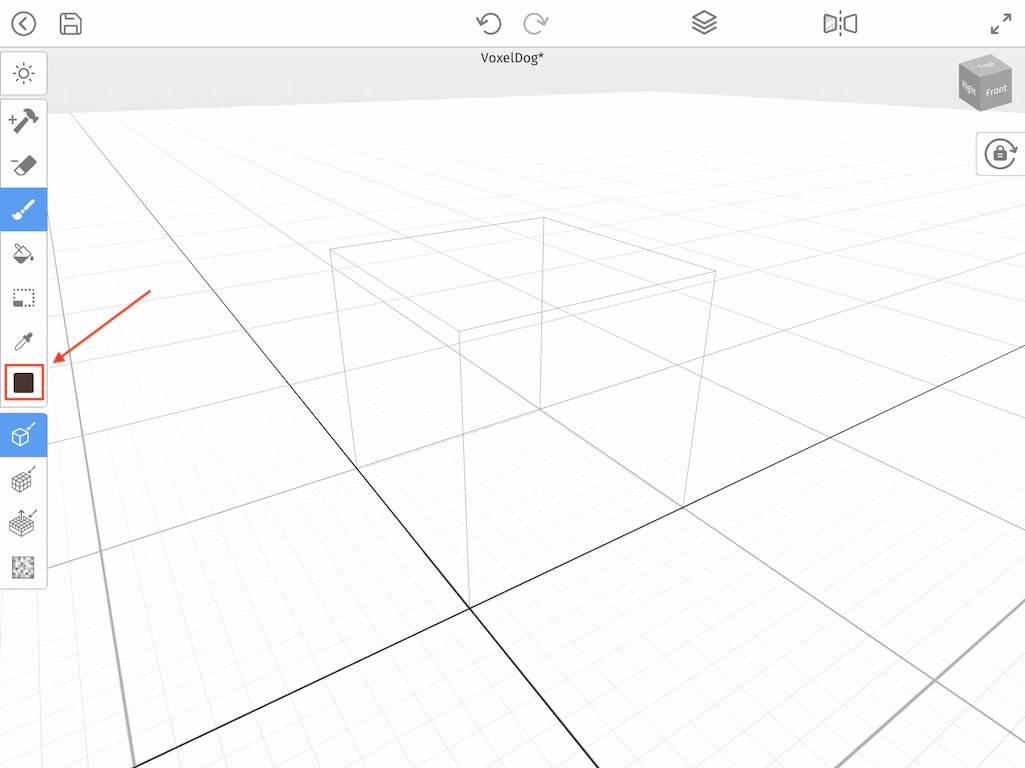
First let’s select a color for the body of the dog. To change the color click on the square icon on the left side.
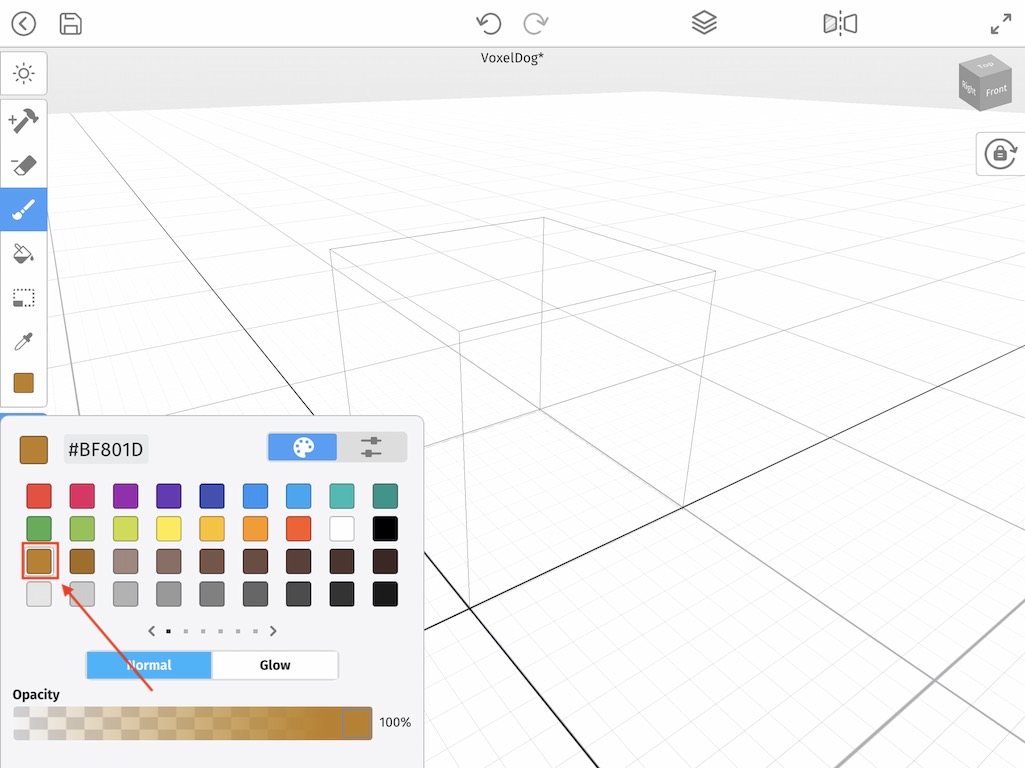
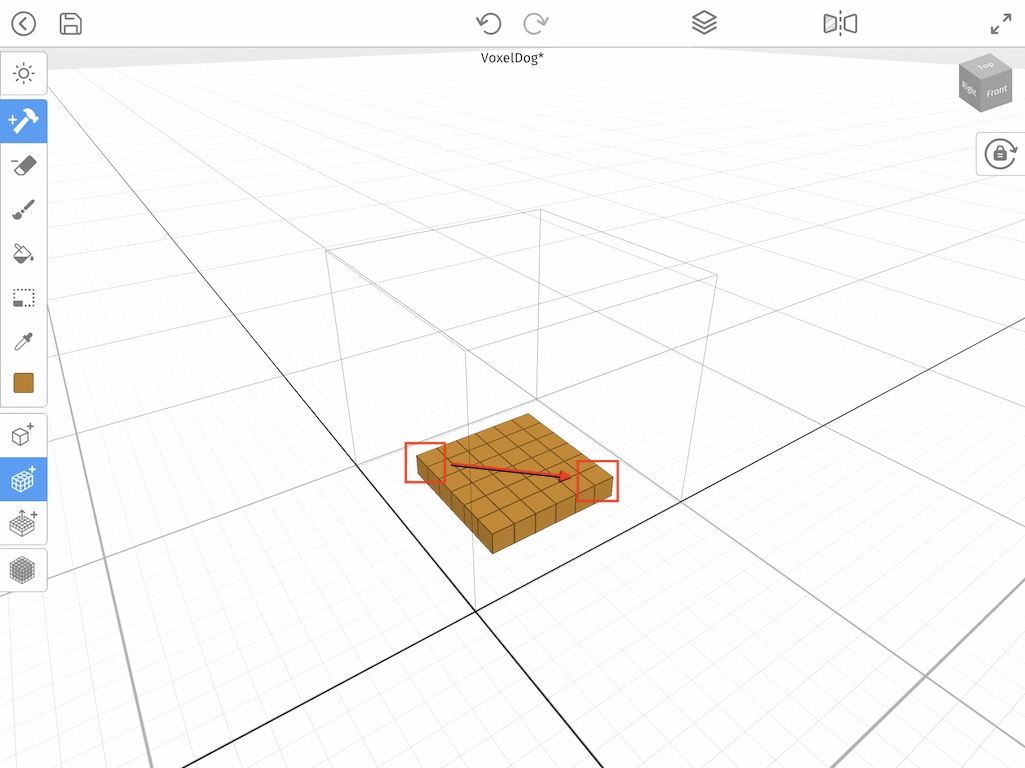
Now that you have the brown color selected lets build the base. If you notice you the Add Tool is already selected. That is the Hammer button on the top left. This allows you to add voxels to your grid. On the bottom left you’ll notice the single square icon is selected. These are brush types that you can use to add voxels. Currently the Voxel Mode brush is selected. However we want to create more than one voxel so we will change that. Instead we will select the Box Mode brush (This is highlighted below in the toolbar on the left). Now to create the base, tap on one corner of the grid and drag to the opposite side to create a rectangle of voxels. Use the image below as a guide.
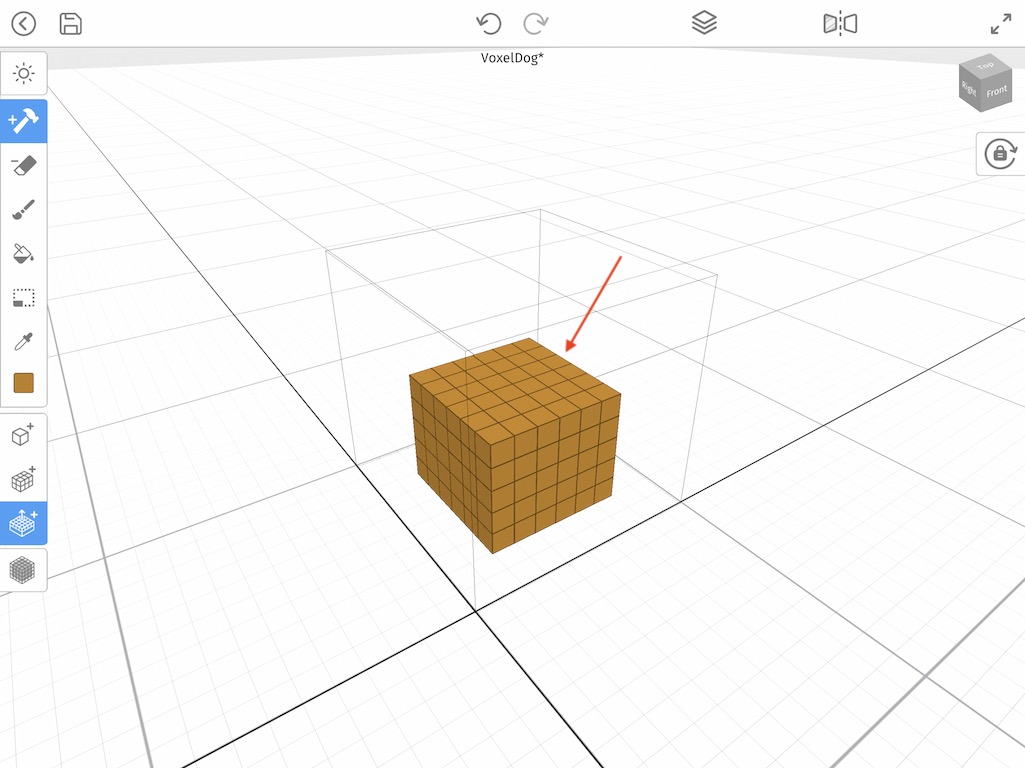
Awesome! Now we could repeat this, but there is an easier way to duplicate voxels. Select the Face Mode Brush instead of the Box Mode Brush in the tool bar on the left.

This brush selects all voxels at the same level and adds a layer so that we don’t have to manually drag using Box Mode brush. Now that you have the correct brush, simply click on the top of our layer of voxels we made 4 times. It should look something like this.
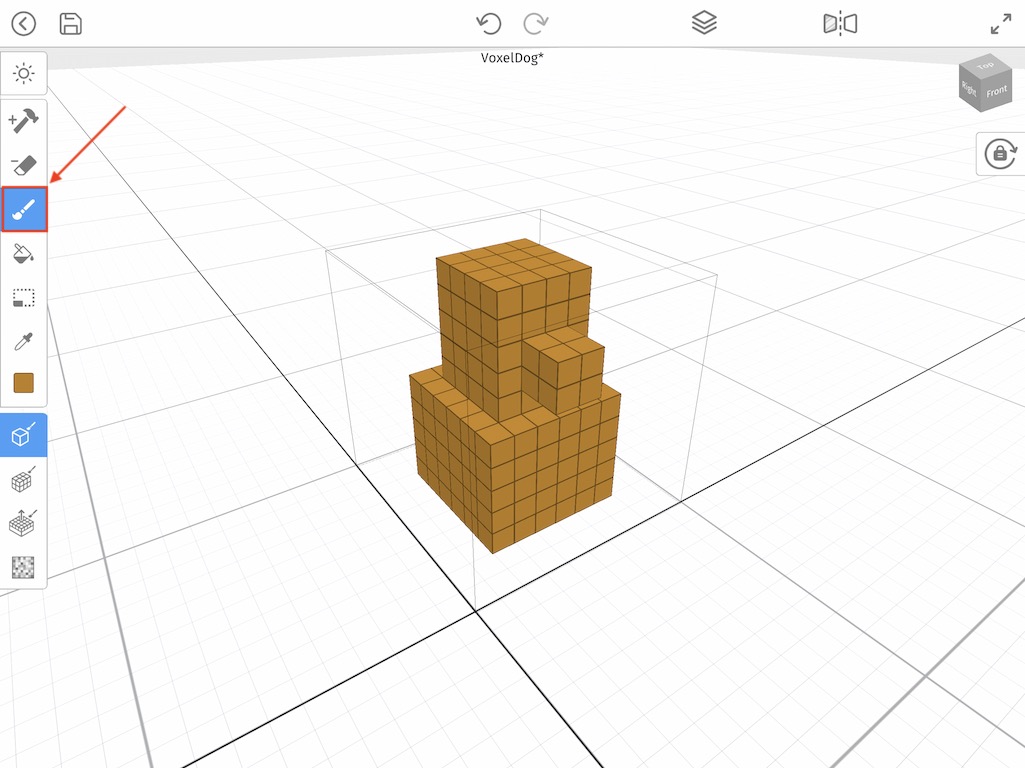
Creating the Head
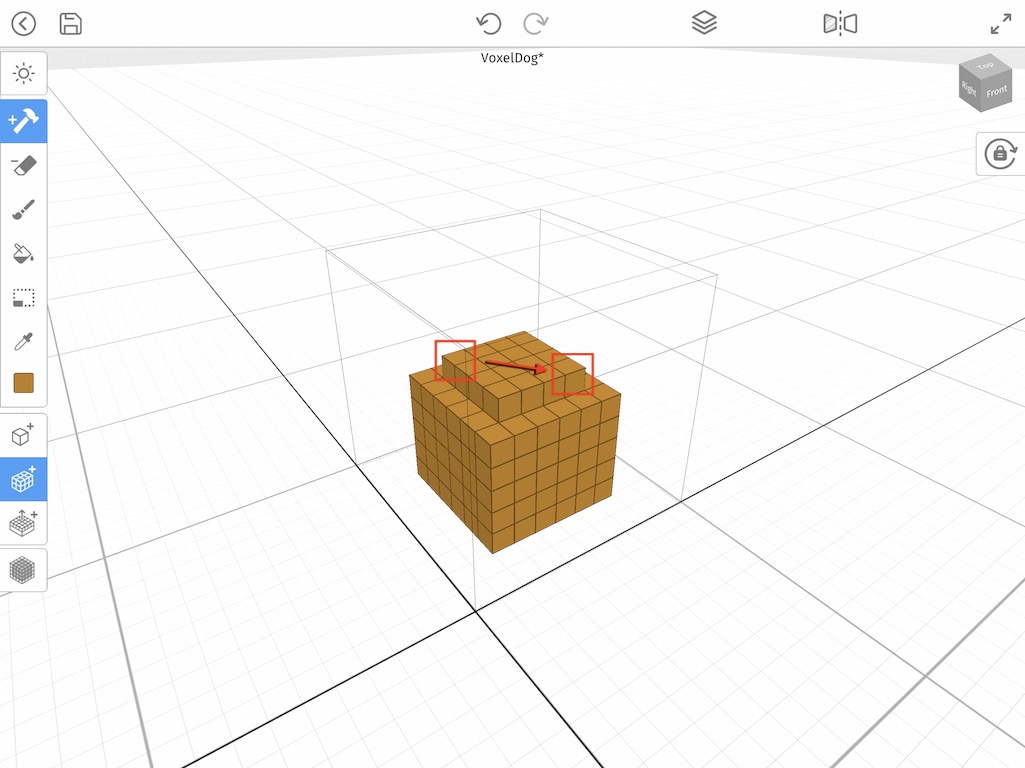
Now that we finished the base of the body, let’s create the head section of our voxel dog! Let’s switch back to the Box Mode brush. Using the same technique start on one corner and drag to the other side. Make sure to go in 1 voxel all the way around so that the head is smaller than the body. Use the image below as an example.
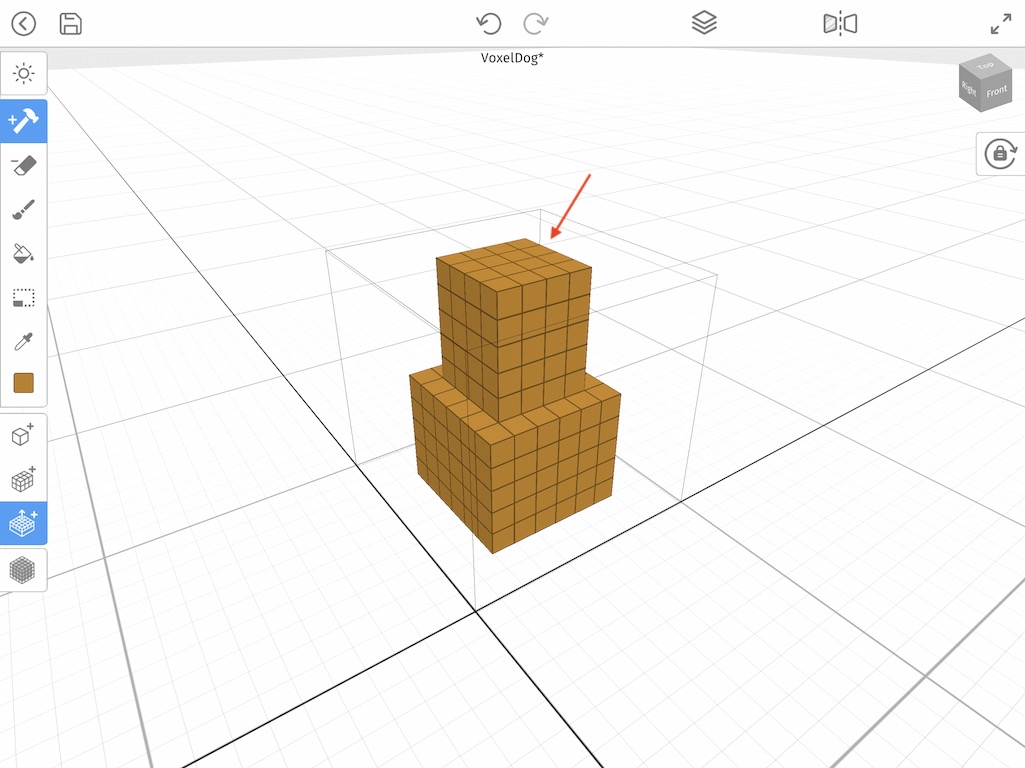
Again let’s use the Face Mode brush to duplicate the first layer another four times just like you did with the base so that the head becomes taller.
Creating the Nose
Now we have the basic structure for our dog we can make the nose. For this we will change the brush from Box Mode to Voxel Mode. This will allow us to add single voxels. So start off by selecting the button with the single cube and then simply tap to add voxels to create a nose. Try it for yourself. Use the image below as a guide:

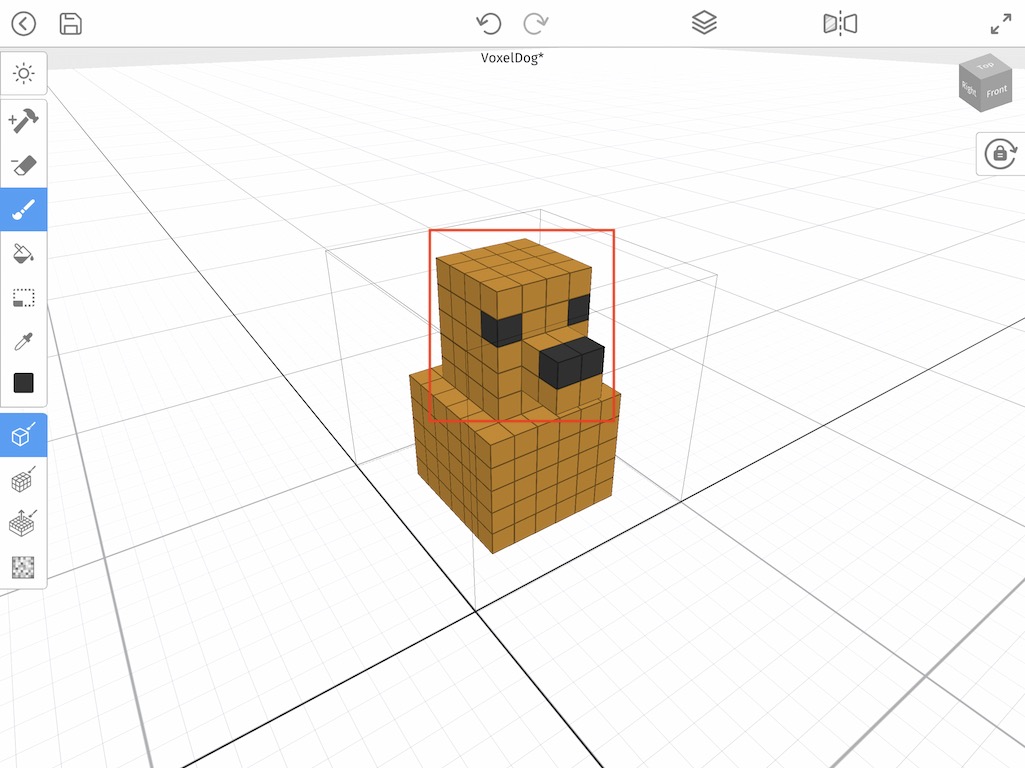
Paint the Eyes and Nose
Now it’s time to give our dog character a little more detail. Let’s select the Paint tool so we can color some voxels.
Now let’s select a dark gray color from the color palette for the eyes and nose. Once you have that selected go ahead and tap on the existing voxels to create some eyes and a nose. Use the image below as a guide to give the dog some more detail.
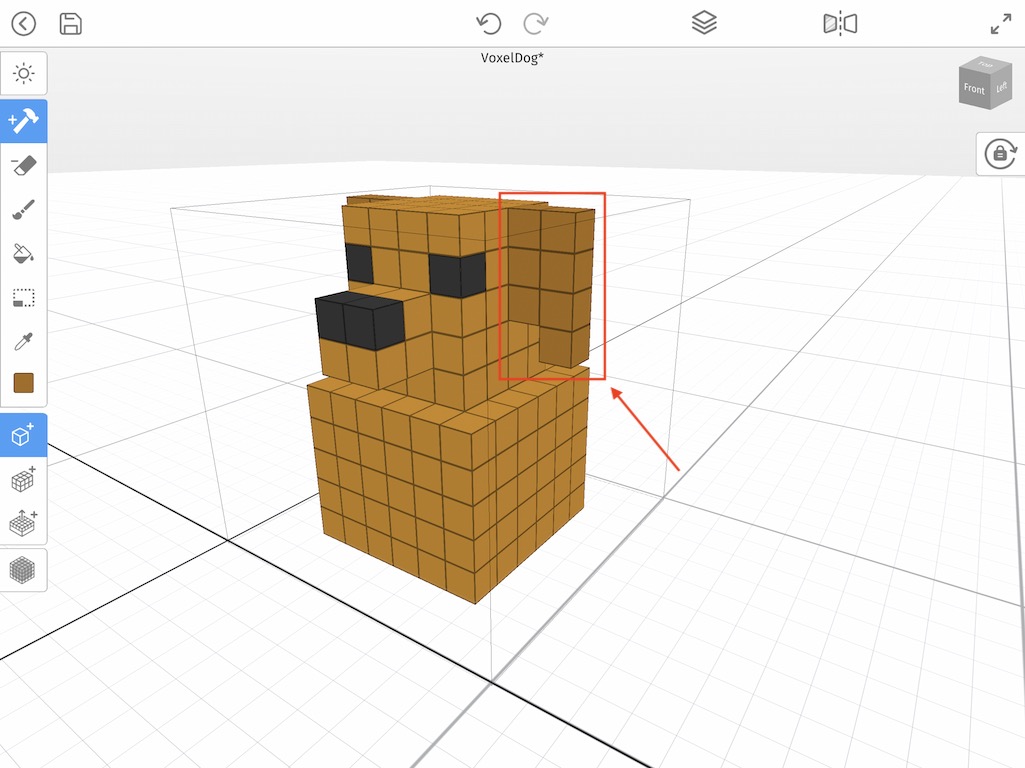
Adding Some Ears
Next up on our dog is to add some ears. So to add them let’s first make sure that you change the color to a brown color. We used a slightly darker brown to try to make then stand out more. After that make sure the Add Tool is selected and that Voxel Mode brush is set. Then simply add voxels to create the ear. Use the image below as a reference:

Once you do that to one side, you can repeat the process on the other side.
Adding Legs
So currently our dog doesn’t have any legs. For the legs lets select the brown color we used for the body. Make sure you still have the Add Tool selected and that Voxel Mode is still activated. Now simply tap to add voxels to create the hind legs.
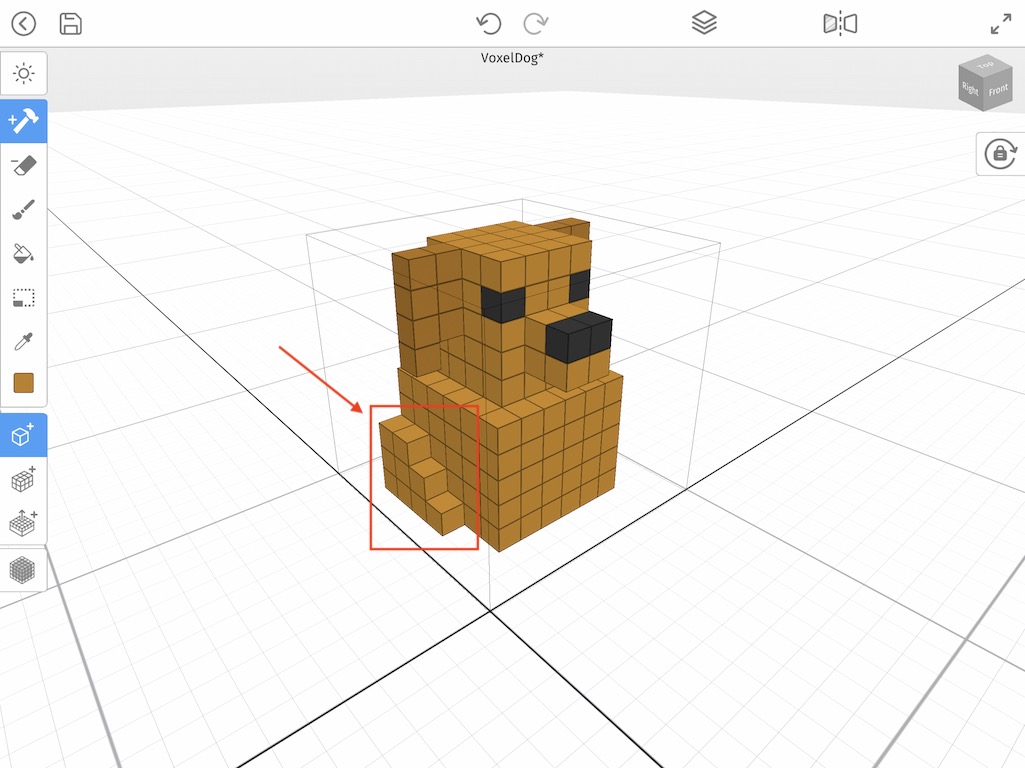
Like before, repeat the process on the other side.
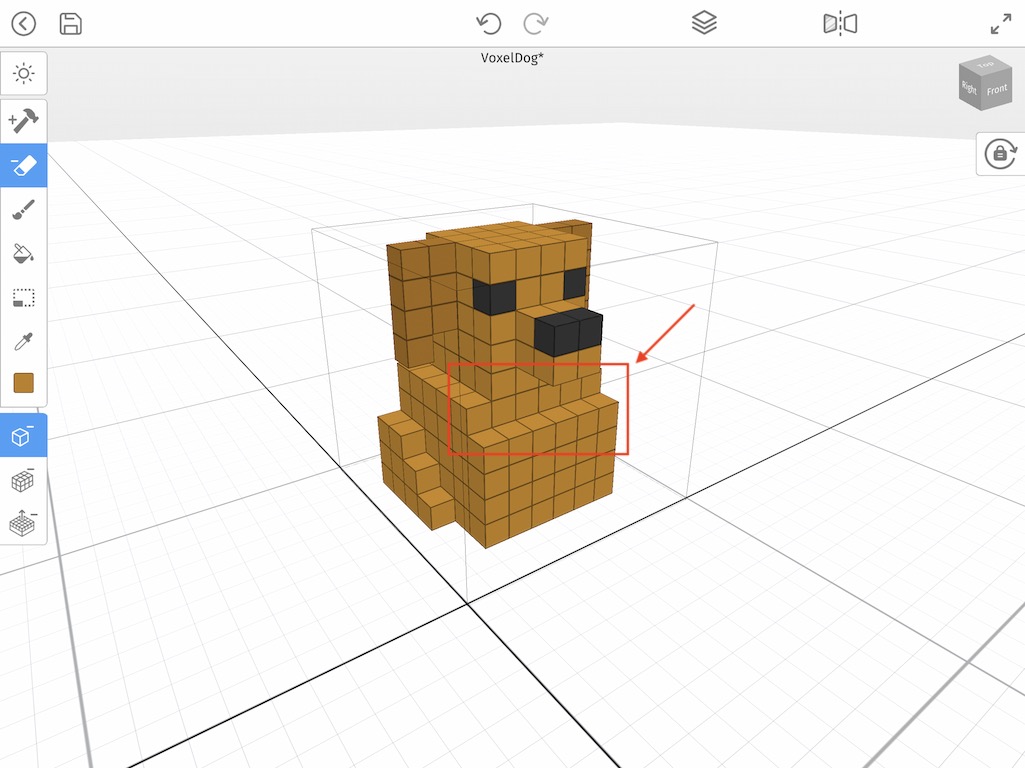
Now to create the front legs we are actually going to carve them out of the main body by using the Erase tool. Simply press the button with the eraser icon to activate the Erase tool.
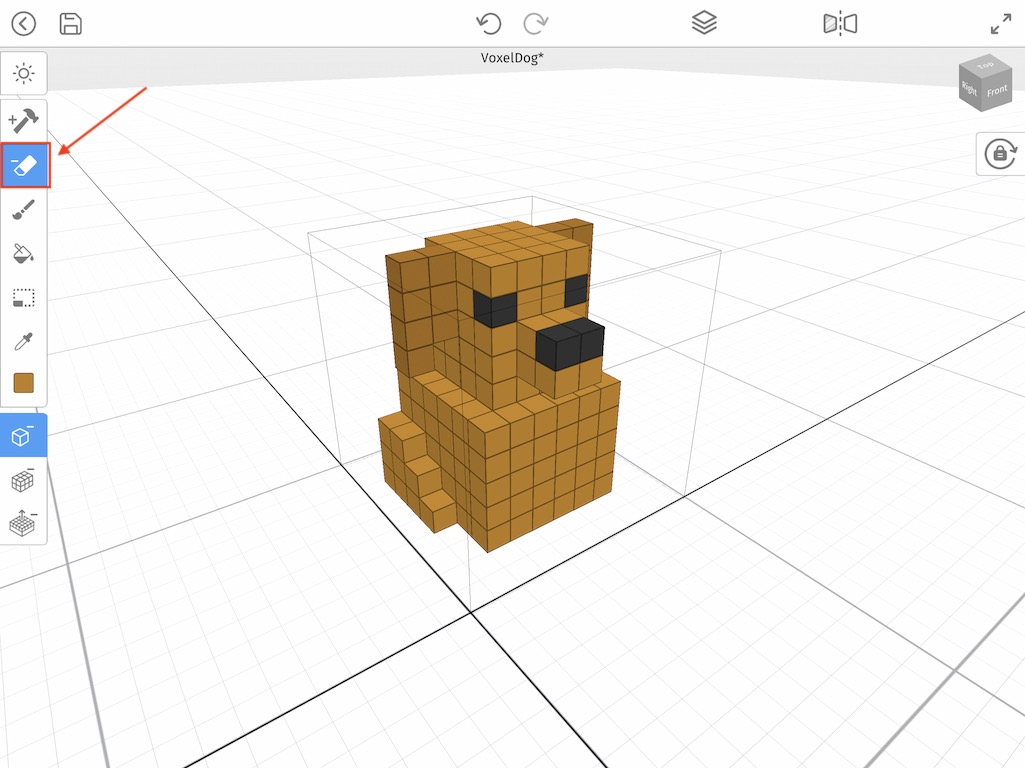
We are going to delete a row of voxels from the top of the body to help create the top section of the front legs. Try to replicate the image below:
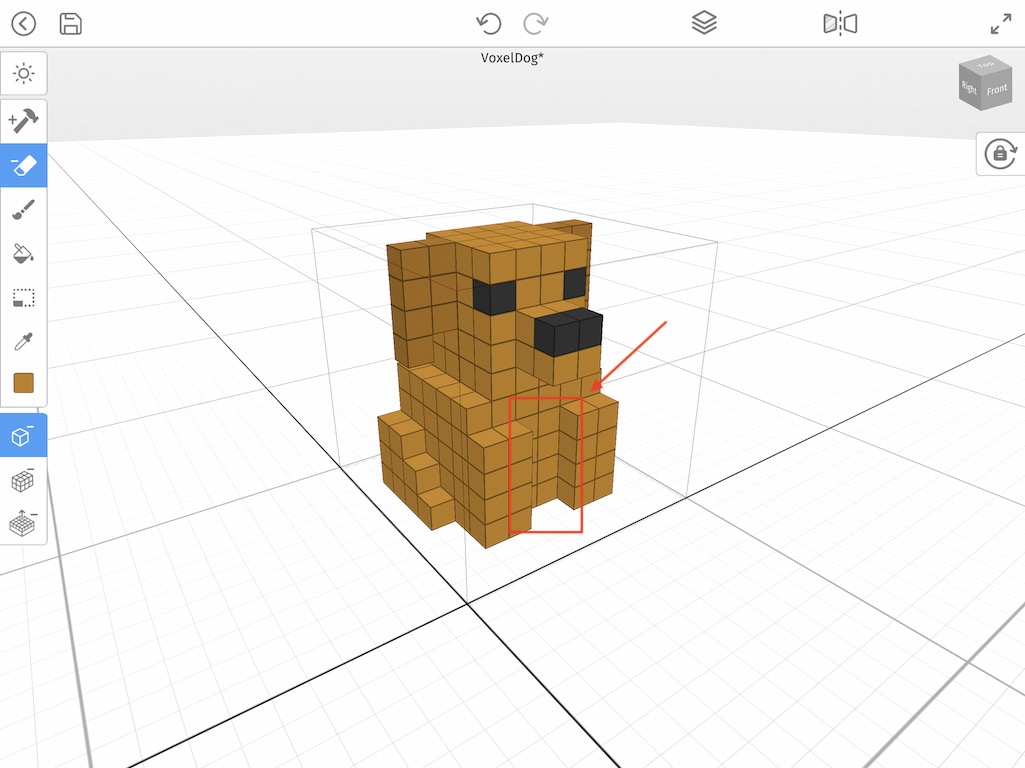
Next, let’s carve out the center so that it creates two individual front legs.
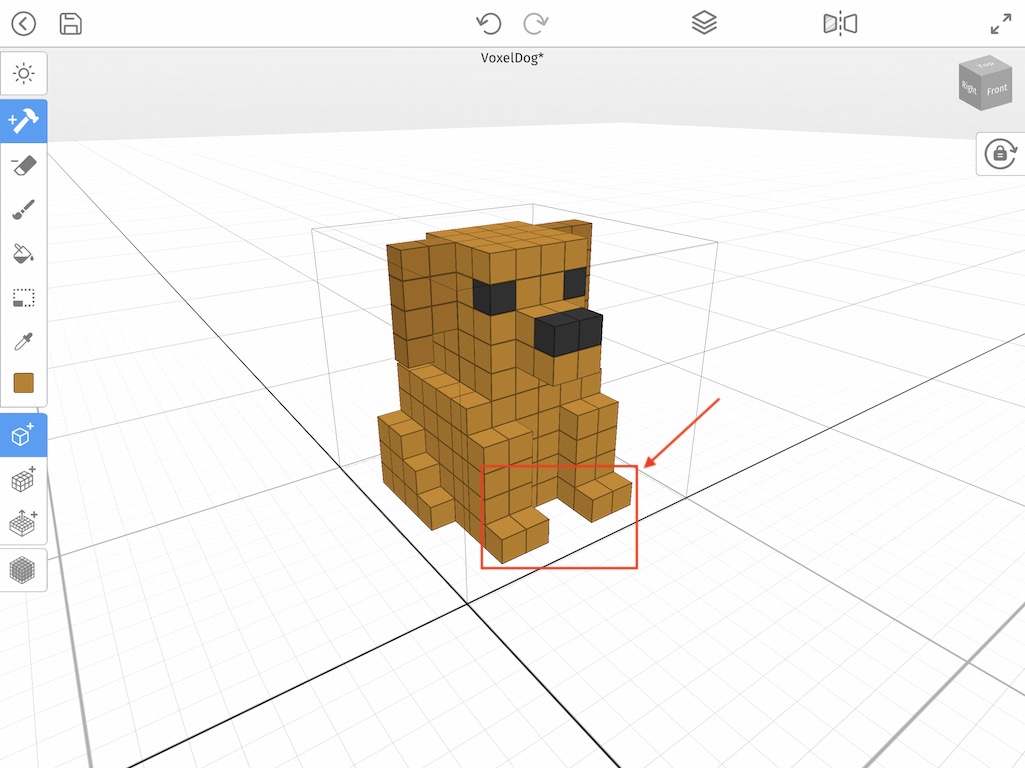
Great! Now all we need is to add some paws in the front. Change from the Erase tool to the Add tool and add two voxels for the paws on each leg.
Fine Tuning
Now that we finished the majority of the voxel dog, lets add some finishing touches to make it look even better! If you notice the paws are the same color as the body. Also the body of the dog is all the same color as well. Let’s add some more detail by coloring!
To do that, select the Paint Tool. Select the color white from the color palette. Now paint the tips of the paws and center body like the image below:

Congratulations! You just completed your first voxel model using a voxel editor! What’s better is you learned a lot of crucial skills in Mega Voxels that can be used to make other voxel creations!
Share your Voxel Model
Now that you’ve created some cool voxel art, you’re probably want to share it on a social network! Depending on what you want to do there are different options to choose from. In this tutorial we’ll show you how to turn your voxel model into an image so you can share it on Social Media!
Exporting a Voxel Model as an Image for Sharing to Social Media
To share your new voxel model to a social network like Instagram or Facebook, it must be exported from Mega Voxels to a format that they accept like an image or video. Fortunately Mega Voxels supports the .png option which is the most widely supported image format. However first we need to change our camera mode.
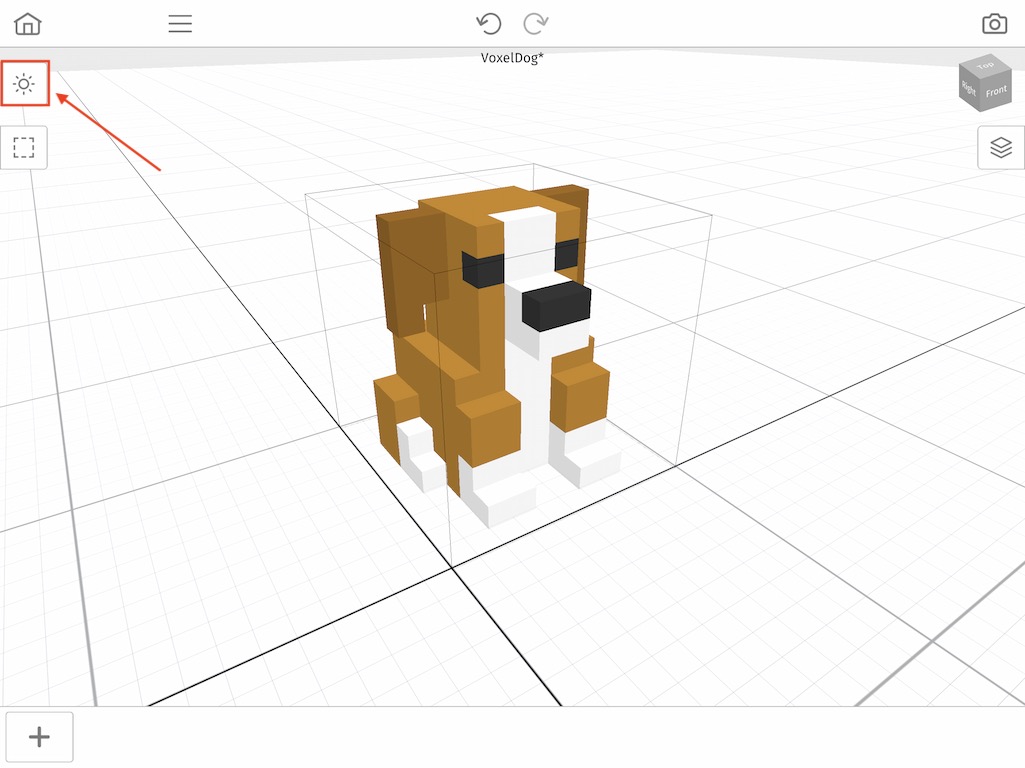
Voxel Art generally speaking looks better with an orthographic camera because it helps reinforce the blocky look. By default Mega Voxels uses a perspective camera. Also shadows add a more 3D look to our models so they don’t look flat. The nice thing is that we can change this easily by tapping on the Scene Settings button on the top left.
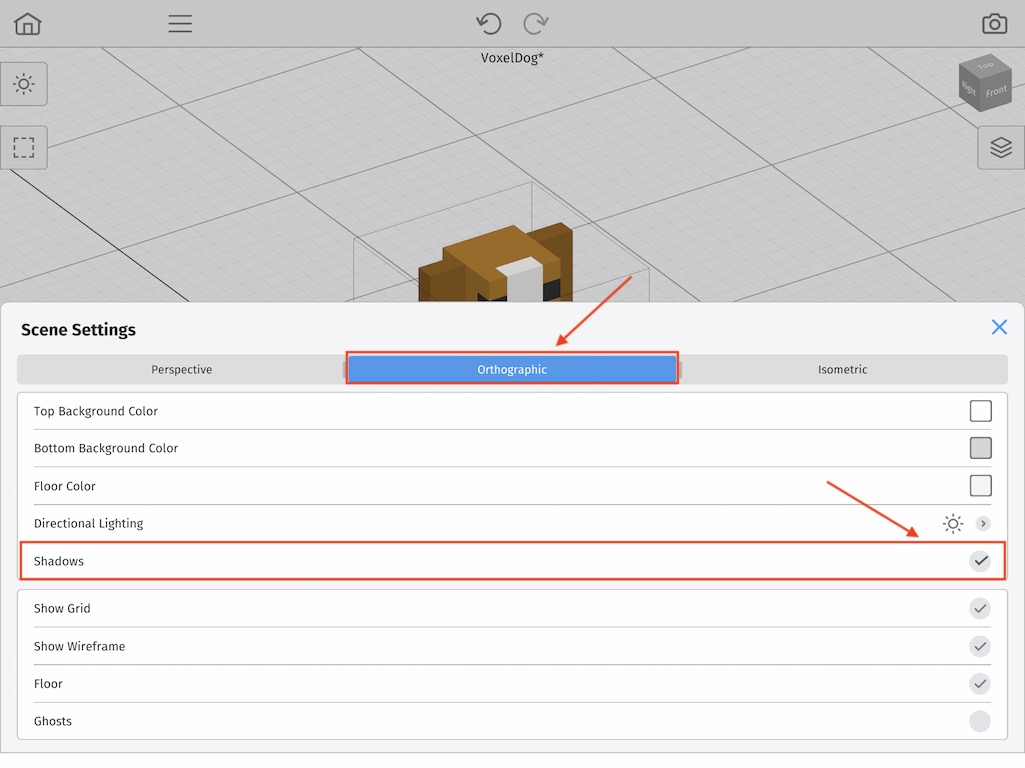
When the menu is open select Orthographic at the top instead of Perspective. Then make sure the Shadows toggle is selected. When done press the X button on the top right of the pop window.
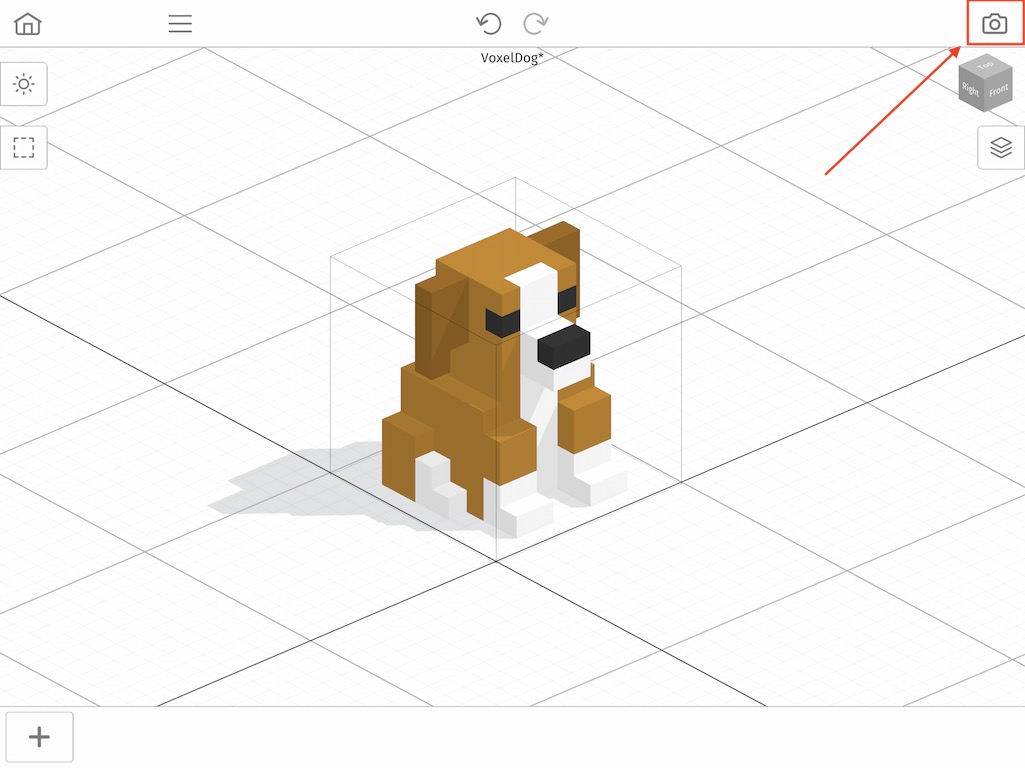
Now you are ready to share your creation! To export any voxel model from Mega Voxels as a PNG image, simply click the Share button on the top right of the editor window:
After you hit that you will be taken to a screen with several options on the right side and along the bottom.
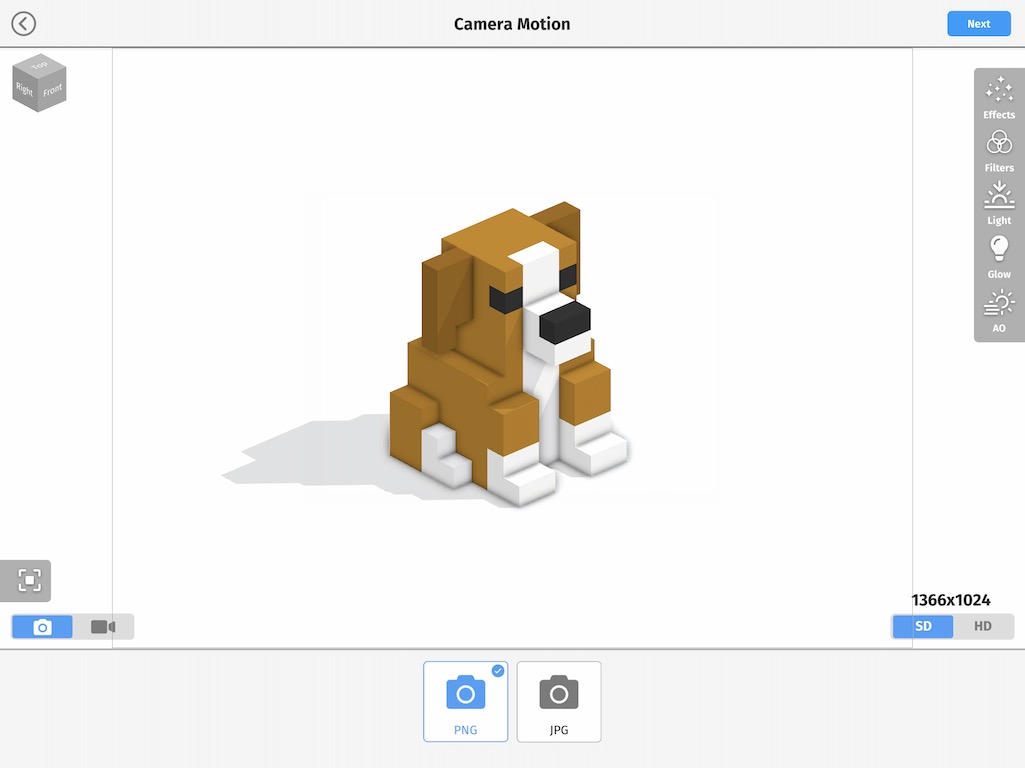
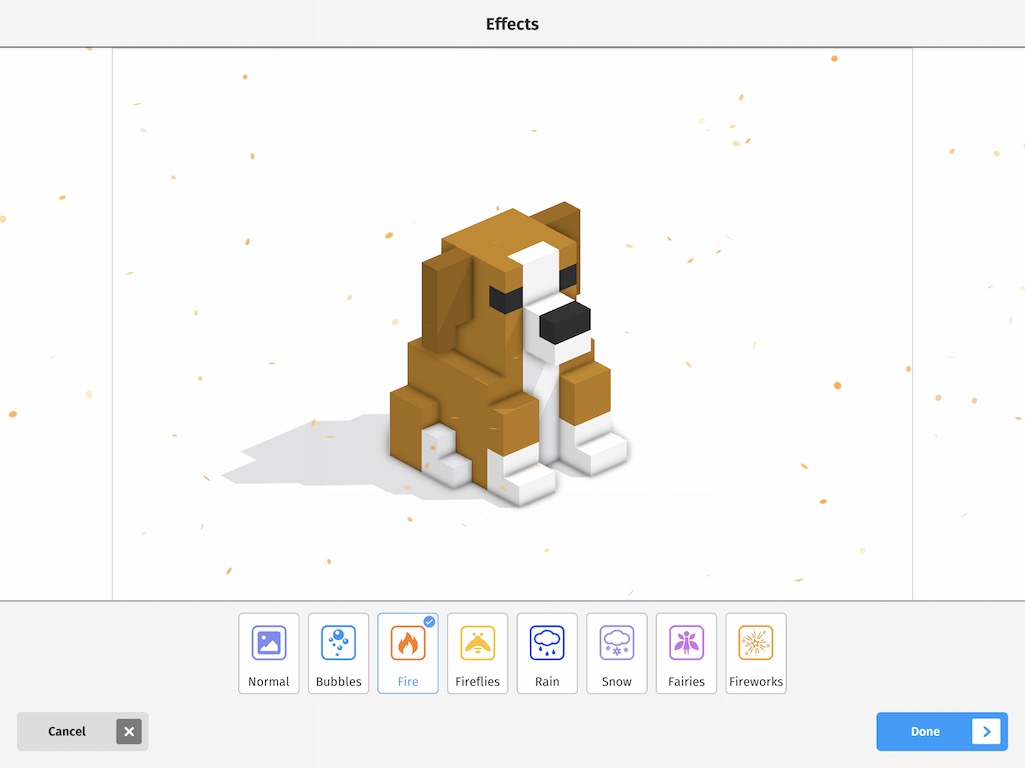
The first item is called Effects, and this is where you can add Special Effects to your photo. Effects include rain, fireflies and even Fire! If you want to add an effect simply tap on it to see a preview.
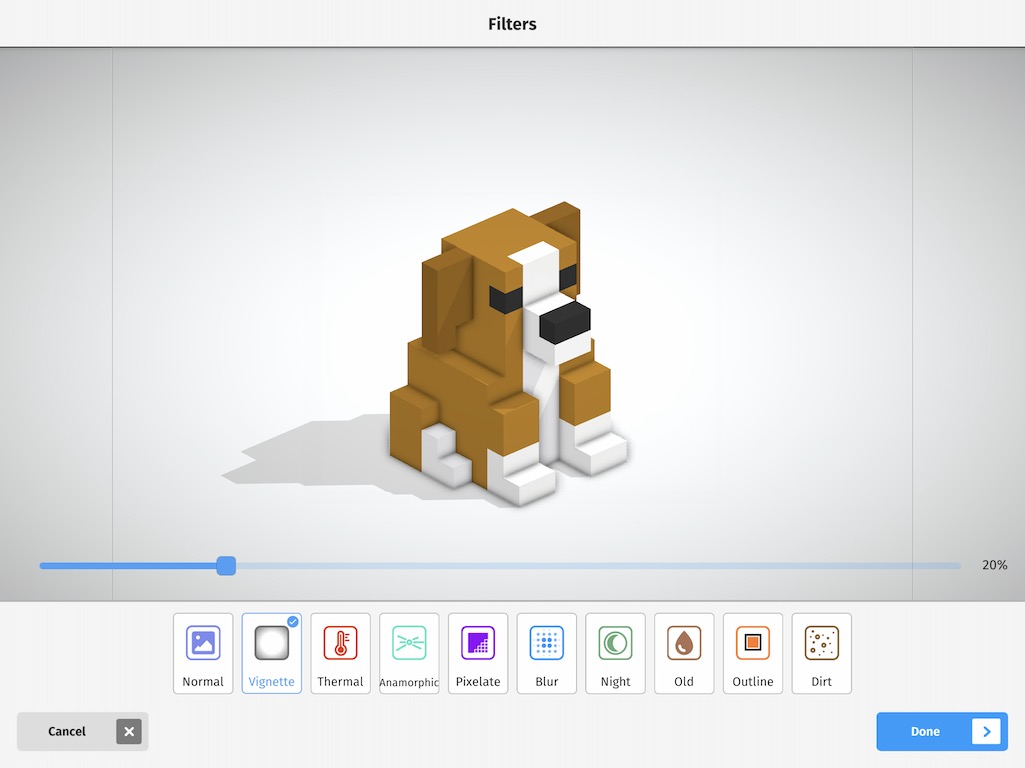
The second item is the Filters screen. Filters are just like the filters you see in popular social networking apps. Again if you would like to try one simply tap on it to preview your model using the filter. This screen allows you to add filters to your voxel model similar to the way you add filters in Instagram. Simply tap a filter to apply it to your model.
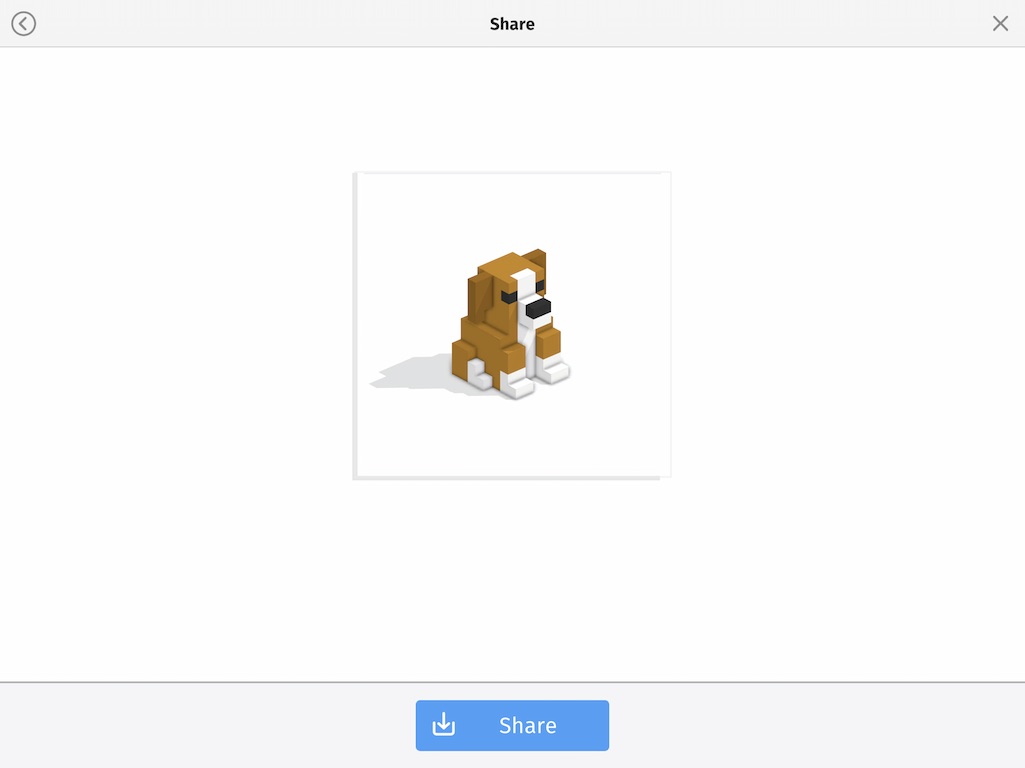
Feel free to experiment with the different buttons on the right including the options on the bottom. For this tutorial we opted to share a simple PNG image of our voxel model. It’ll take a few seconds but then you should see a preview of the image. Be sure to tap Share so you can save it to your device or share it to social media.
For more posts on how to use Mega Voxels check out our other great Mega Voxels Tutorials
Success!
That’s it! Now you can share your own creation with the world! If you want to share your creation with us for a chance to get a shout out on our page, tag us on Instagram or Facebook using @megavoxels or use the hashtag #megavoxels! We are always checking for new voxel artists everyday! If this post was helpful please considering sharing it! Have fun!