Mega Voxels and Blender work great together to create fantastic voxel art models with the extended features of Blender. In this tutorial, we will discuss how to import your Mega Voxels models into Blender.

So you made a voxel model inside of Mega Voxels and now you would like to export the model into Blender so you can make animations, custom modifications, or other alterations that aren’t possible to do in Mega Voxels. The most common question is, how do I import Mega Voxels into Blender? The great thing is that Mega Voxels supports export options that work seamlessly with Blender. In particular, it supports the .OBJ model type which is widely supported by 3D modeling programs including the Blender Modeling Software. We’ll be going over the steps on how to import your voxel models into your Blender. First we will show you how to export your voxel model out of the Mega Voxels Editor.
How to Export your Voxel Model out of Mega Voxels
So before you can export your voxel model out of the Mega Voxels editor and import it into Blender, you must first understand the different types of model files that Blender supports. Blender like other 3D modeling applications supports a diverse set of common model types such as Autodesk FBX, Collada DAE and Wavefront OBJ. The great news is Mega Voxels supports one of the three file types mentioned, which is the OBJ model type. So to start off our tutorial we will show you how export your voxel model using OBJ file format from Mega Voxels.
These are the steps to Export a Voxel Model out of Mega Voxels into Blender:
- Open a voxel model using the Mega Voxels App Open option
- Open the File menu at the top left and Select the Export (.obj) option towards the bottom
- Send the exported folder to your desktop machine
- Unzip the folder that contains the .obj, .png. and .mat files
- Open Blender and import the .obj file using the File menu
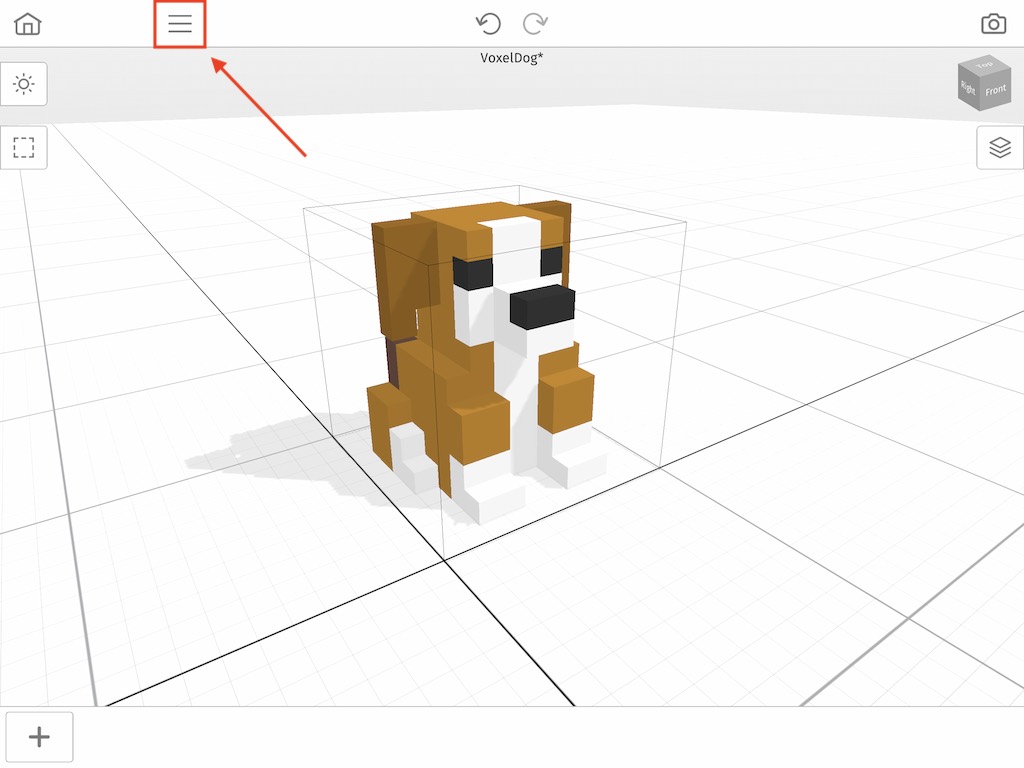
So we will begin by opening a voxel model you already made or create a new voxel model. For this tutorial we used the “dog” tutorial file that you create when you first install Mega Voxels. However feel free to use any model you like. To export a voxel from Mega Voxels, tap on the file button at the top left of the editor. When you do you will see a list of export options that you can choose from.
As we mentioned before when you open the File menu you will see a list of buttons that have different file types to choose from. This menu contains all the import and export options for the Mega Voxels editor. These are the various export
options that we mentioned earlier that are supported by Mega Voxels.
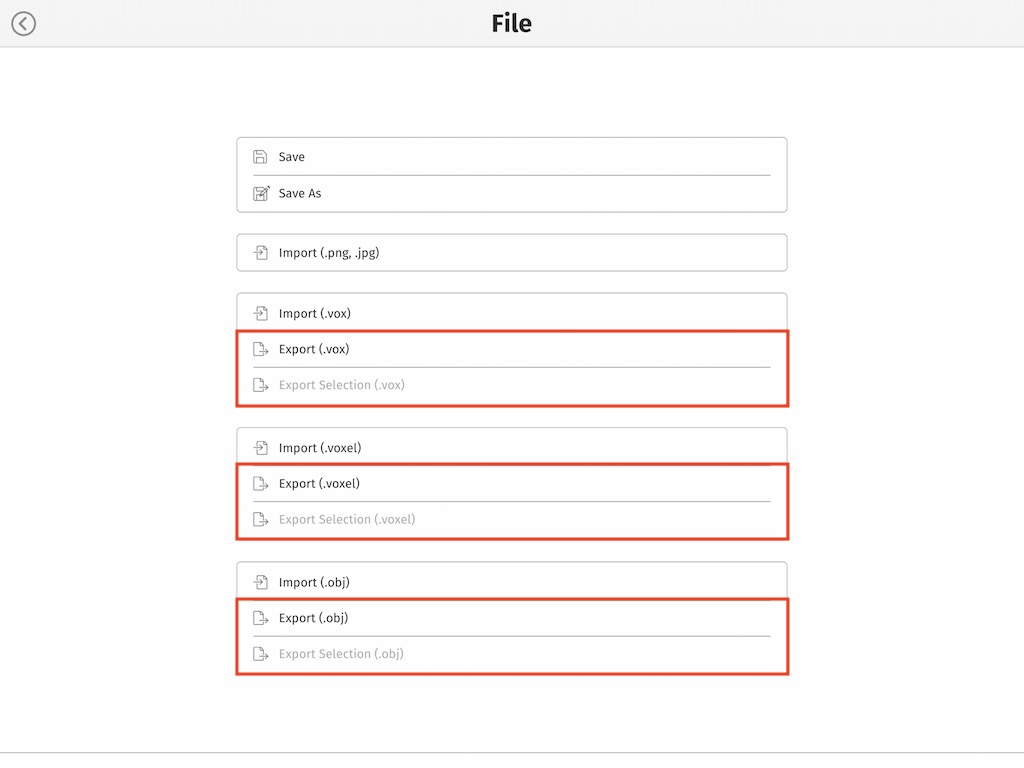
These are the Export formats supported by Mega Voxels:
- Export (.vox) – Export every model in scene as an individual MagicaVoxel model using the .vox file format
- Export Selection (.vox) – Export the currently selected model from your scene using the MagicaVoxel .vox file format
- Export (.voxel) – Export the entire scene using the Mega Voxels .voxel format
- Export Selection (.voxel) – Export the currently selected model from your scene using the Mega Voxels .voxel format
- Export (.obj) – Export the entire scene using the Wavefront .obj format
- Export Selection (.obj) – Export the currently selected model from your scene using the Wavefront .obj format
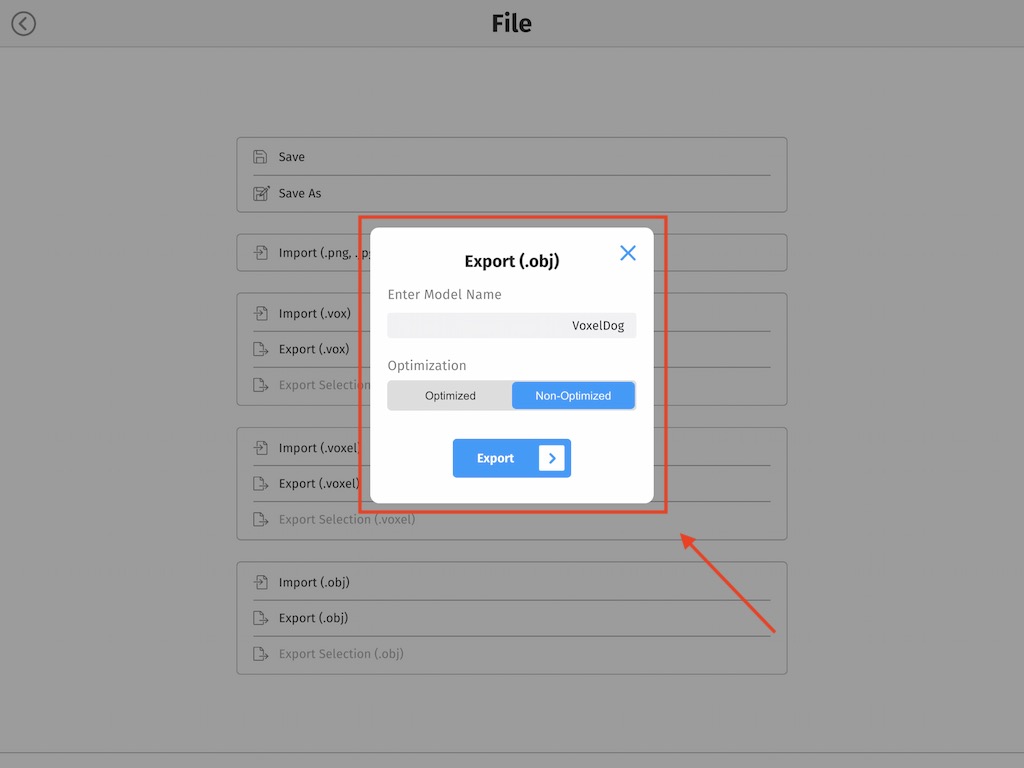
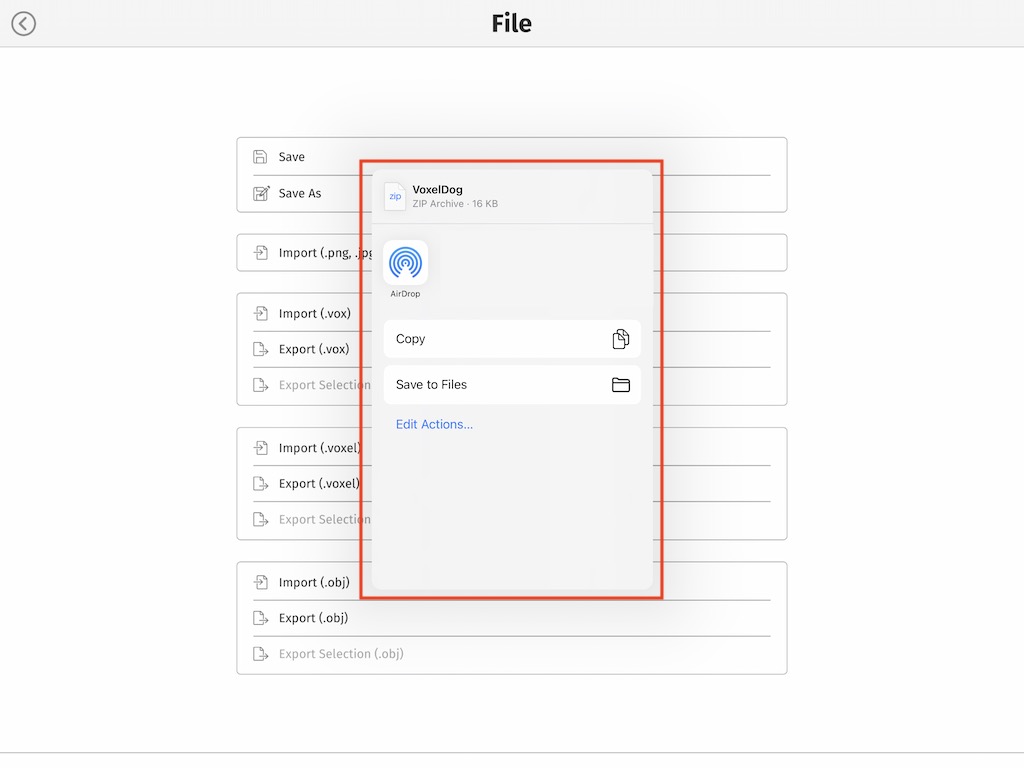
For this tutorial we will be focusing specifically on the button that says Export (.obj). This option can be found towards the bottom of the File menu. Now the next screen will vary depending on the platform you are using Mega Voxels. The overall idea however is the same. This will open up a menu that will allow you to select how and where you would like to save your new file. Since we are using the app on iOS we decided to use AirDrop and send the model to our MacBook Pro. Feel free to use the option that is best for you. At the end of the day you want to make sure that this OBJ file gets to your desktop machine that has Blender.
Import Your Voxel Art into Blender
Now that you have your exported your voxel model out of Mega Voxels and you have the exported folder on your machine, you are ready to import your model into Blender. Keep in mind Blender runs on Windows and macOS. The steps you see here are for a Mac. However it is identical to importing a model for Windows.
Go ahead and open up Blender. If you see a cube in the center go ahead and delete it that way you have an empty scene to import your model into. The second step is to unzip the folder you received from Mega Voxels. The reason there is a folder is because Mega Voxels created an obj file, a texture file and a material file that will allow you to see the textures inside of Blender. Next, to import it, go into File > Import > Wavefront (obj).

After you click that a file window should open. Navigate to where your folder with your model is located. Go ahead and select the OBJ file that was exported from Mega Voxels. When you select your OBJ file click Import OBJ.

Once you click the button you should immediately see your model inside of
the main window in Blender.

Now you might be wondering why it’s gray. By default Blender displays models
in a flat color (gray). In order to see the texture we will have to change
the Viewport Shading so that the Material Preview mode is selected.

Click on the button with a sphere icon next to the Solid Mode icon. If you rollover the icon with your mouse it should say Material Preview. Go ahead and click that.

Okay, were are getting very close to seeing our model as it appears in Mega Voxels. You can kind of see our texture but for some reason its very blurry! The reason is that when you first apply textures to a model in blender the Base property under the Surface of the material is set to Linear. This makes textures look blurry. To fix that we will change it from Linear to Closest:

After you locate the property as we have above be sure to select Closest instead like the image below.

And if everything worked ok your model should now appear crisp like the picture below.
And that is it from here this model is completely modifiable like a regular 3d model inside of blender.
Where to Go from Here
And there you have it! Now you know how to successfully import a voxel model into Blender from Mega Voxels. If you have any question or comments please leave them below. Thanks for reading.