Mega Voxels and Unity are a great combination for making video games using a 3D pixel art also known as voxel art. In this tutorial we will be showing you how to create models in Mega Voxels with transparency and import them into the Unity Game Engine.
After you have created a transparent voxel model inside of Mega Voxels you are now ready to export it out of Mega Voxels and import it into Unity so you can make your video game. Lets say for example that you made a window on a house or maybe a windshield on a car. Now you might be asking, how do I export a voxel model with transparency out of Mega Voxels and import that opaque model into Unity? Fortunately, Mega Voxels works great with Unity by providing separate materials for you models that can be set up inside of Unity allowing you to create glass models or even water models. We’ll be covering the steps to import a transparent voxel art model into your Unity project.
Getting Started
Mega Voxels has become a great option for indie game developers not only because of how easy it is to make 3D models, but because it allow you to create transparent models such as glass models or water models too. Combine this with the Unity Game Engine and anyone can make their first video game fast. There are two primary steps that we will cover to get your voxel models into Unity. First we will export a model with transparency out of Mega Voxels. Then we will import the voxel model into Unity. We will cover these steps in more detail in the next section.
This tutorial supports Mega Voxels 1.7 or newer. If you need help installing Mega Voxels, view our previous tutorial How to Install Mega Voxels. There you can find a step by step tutorial on getting Mega Voxels running on your device.
This tutorial supports Unity 2020 or newer. If you need help installing Unity, view our quick tutorial How to Install Unity. There you can find a step by step tutorial on getting the Unity Game Engine running on your computer.
How to Export a Model with Transparency from Mega Voxels
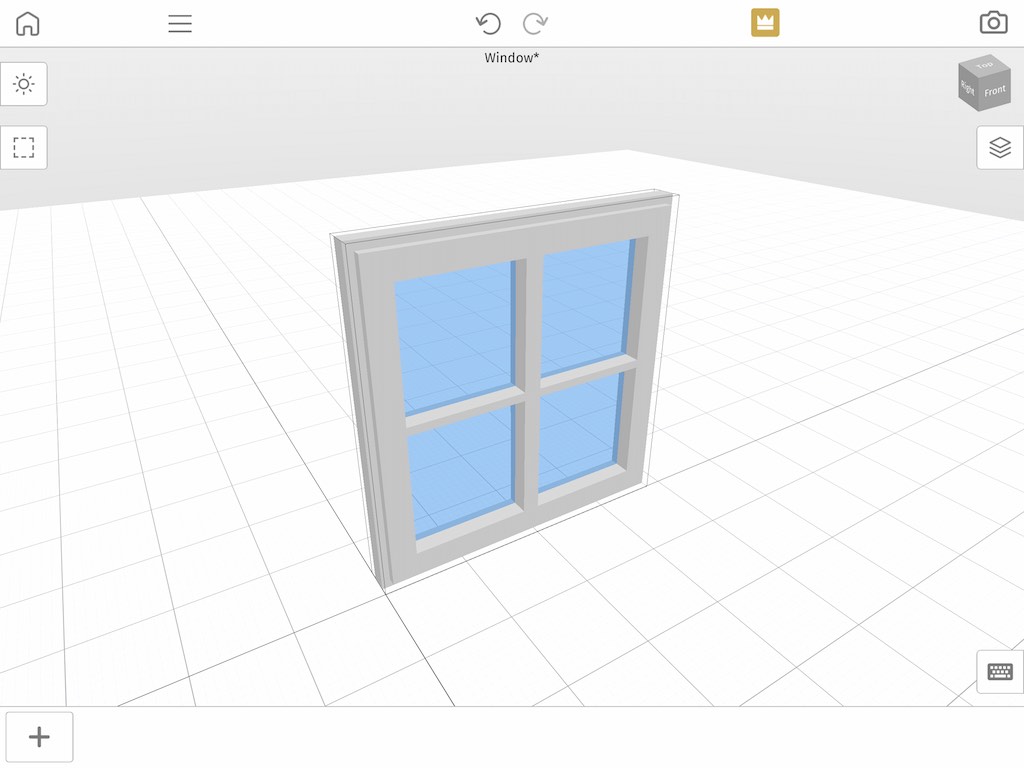
Now before we can export a voxel model out of Mega Voxels and import it inside of the Unity Game Engine, we must first learn what types of files Unity supports. Unity supports a diverse set of 3D model types including .FBX, .DAE and .OBJ. Now Mega Voxels has the ability to export quite nicely using the .OBJ file format. So to begin we will export our voxel using .OBJ. For this tutorial we used a simple window model that we made in the app, however this process is universal so feel free to use any voxel model that you like. The main point is that the window frame is a solid color (no transparency) while the glass is a blue with the opacity set to 50.
To learn how to create glass material in Mega Voxels view our tutorial How to Make Glass in Mega Voxels
To access the OBJ export option in Mega Voxels, tap on the File menu (hamburger icon) at the top left of the editor.
When you open the File menu for the first time you will see several options to choose from. There are only two that apply to this tutorial however. Its two options towards the bottom titled Export OBJ and Export Selection OBJ.
These are the Export formats supported by Unity:
- Export (.OBJ) – This exports your entire scene as individual OBJ files with textures. This is a good option if you make a scene with multiple models that need to be included together.
- Export Selection (.OBJ) – This exports only the selected item as individual OBJ files with textures. This is good if you only want to export a specific model.
For this tutorial we will select the last option, Export Selection (.OBJ). Before you hit that button make sure that you have the model selected in the scene, if not the button will be disabled.
Now that you have it ensured you have the model selected go back to the File menu and tap on the Export Selection (.OBJ).
When you select this export function, you will have the option to export your model as Optimized or Non-Optimized. Basically this option is important for Game Developers especially when making games for mobile devices. Optimized will make your model file smaller which is ideal for mobile. However Non-Optimized will make the model water-tight, which is good for animation. For this example we will use the Optimized option.
Now depending on what operating system you are using you will see a different popup, but overall the options are the same. For Android OS, on you should see something like this.
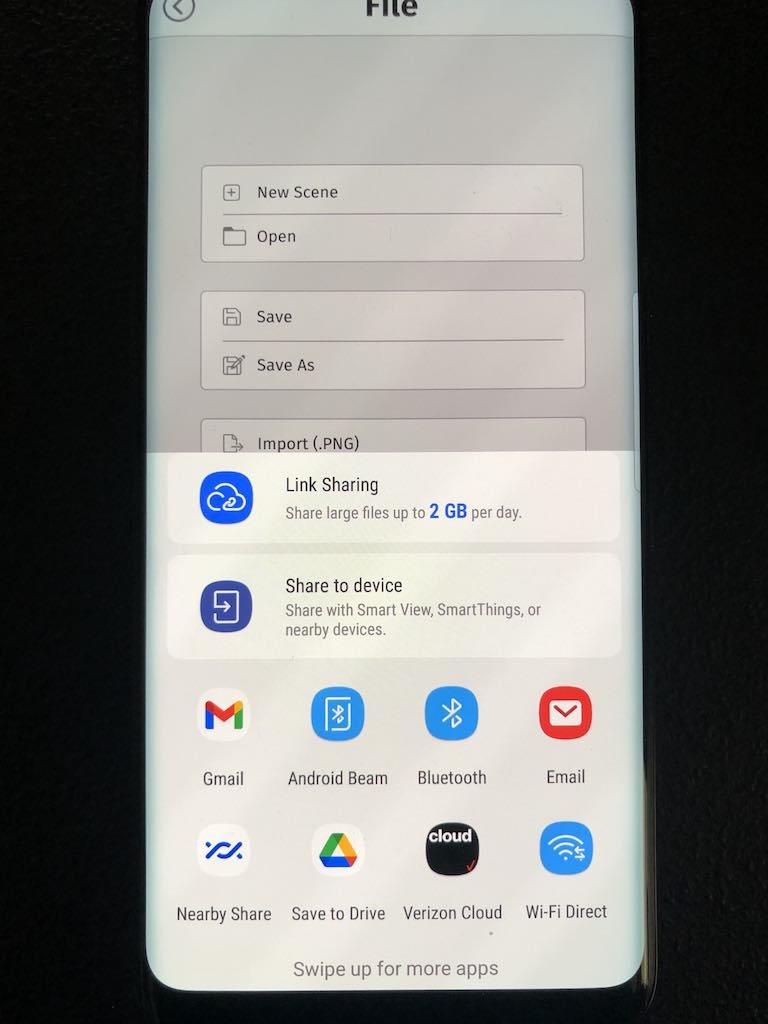
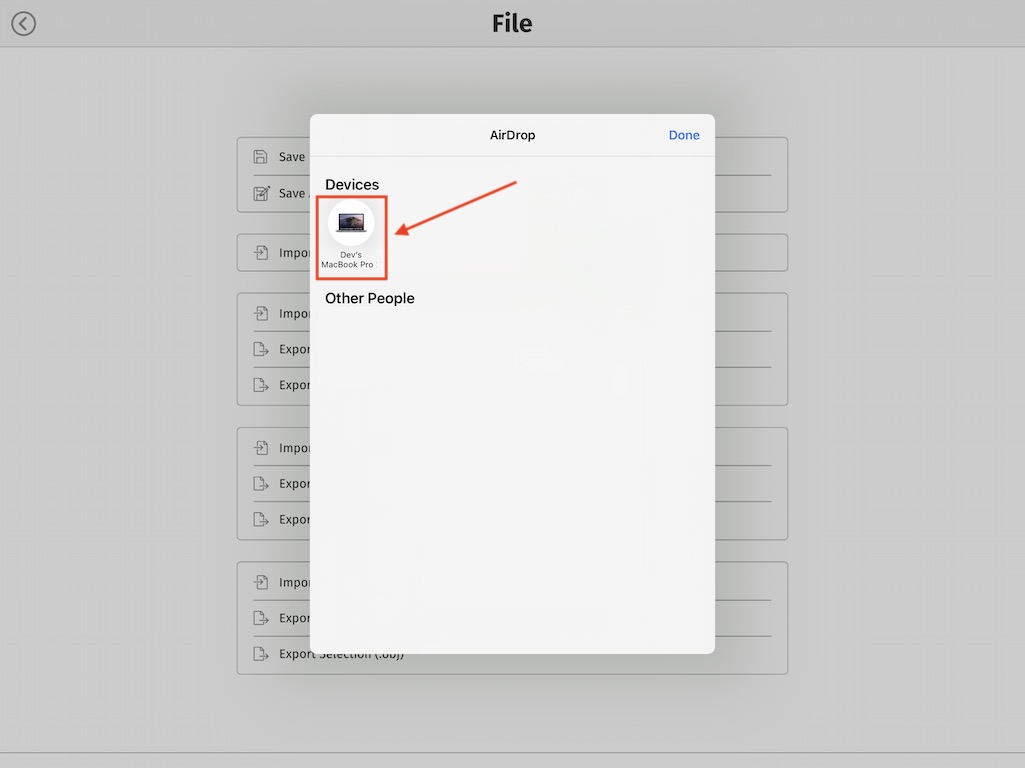
The main purpose here is to export the files from the editor onto your computer. As you can see, any app or service installed on your device is available including Gmail and Google Drive. You can use whatever options works best with your workflow. In our example we had the app installed on an iPad so we were able to use the AirDrop tool which allows us to send files from our iPad to our MacBook Pro.
Import Your Voxel Art into Unity
Now that you have your exported your model to your computer, you are ready to import your model into Unity. If you notice when you exported your model it was actually exported as a .ZIP file. The reason for this, is that all OBJ models that are created properly have a 3 files: an OBJ file, a MAT file and a PNG file. Once this .ZIP file is on your computer go ahead and uncompress it. This important because Unity does not accept .ZIP files.
Note: If you haven’t already create a new project in Unity, or open an existing project in Unity.
Once you have your project open in Unity, and you unzipped your folder from Mega Voxels, simply drag your folder into your Unity project. Its important to note that you must drag it inside of the Assets folder if not you won’t be able to use it in your scene. In the image below we dragged our newly created model into the Assets folder.
And that’s it! You should now be able to access your voxel art model inside of your Unity project! Next we are going to show you how to drag it into your scene.
How to Load A Voxel Model into a Unity Scene
It’s actually very easy to import your model into a Unity scene. Simply click and drag the .OBJ file that was inside of the folder into your Unity Scene. These are the files with the cube icon next to it. In this tutorial we had two models that we will be dragging into our scene: The window frame and the glass that goes inside of it.
After you drag them in, you should see your voxel model that you created inside of Mega Voxels. As you probably noticed, Unity automatically detected what material to apply to your model and also what texture to use because it was in the same folder with your model. However you may have also noticed that the glass is no longer transparent. That is because the Unity Game Engine has its own special materials for rendering transparent models into a scene. So basically we need to set the material of our glass model to a transparent material. To do this, click on the glass model file in the Project window. In the inspector tap on the Materials option. Then tap Extract Materials.
Now this takes the automatic material out of the model file and create a separate material file in Unity. Because of this Unity will ask you where you want to save your material file. For simplicity we will leave it in the same folder with the model. Go ahead and click Choose.
Great so you may have noticed that Unity created a brand new material file called palette. This is the new material file we were just talking about. By default Unity set the Rendering mode on our material to Opaque. We want to change this so that it allows Transparency. To do this tap on the drop down where it says Rendering Mode.
Once open select the option that says Transparent.
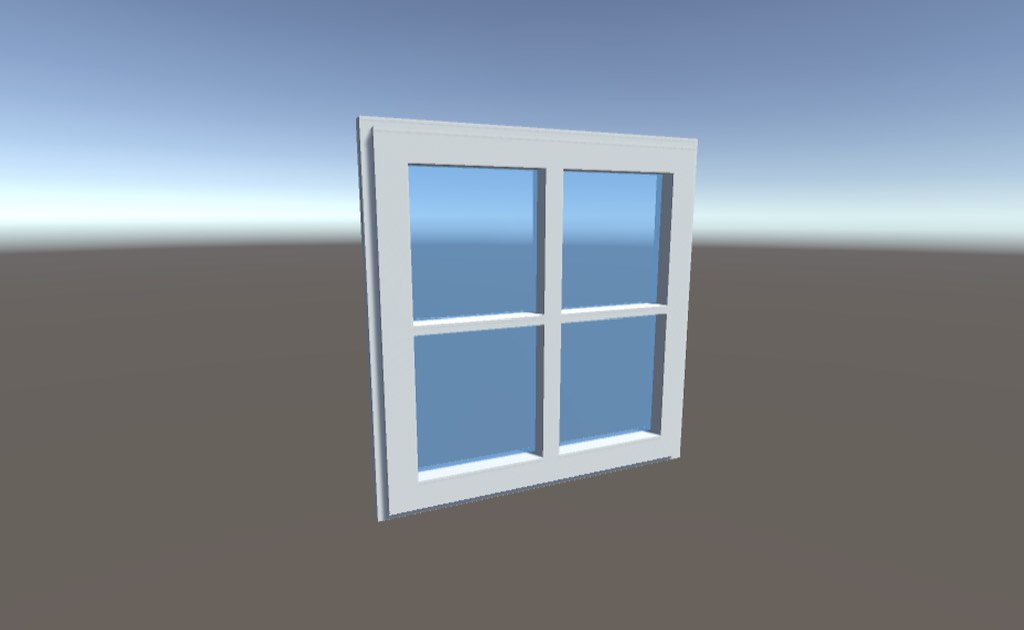
Instantly the glass model will become transparent. You can see through the model just like you would with normal glass. In our example below you can see the horizon through the window.
Where to go from here
And there you have it! Now you know how to successfully import a transparent voxel model into Unity from Mega Voxels. If you have any question or comments please leave them below. Thanks for reading.


